
After my lazy version of the Chocolate Lava cake turned out to be a flop, I was looking for another recipe that had chocolate in it. I will try the lava cake again and let you know how it turned out, but for now, here's something else.
I had Red Velvet cupcakes in mind for a while now as well, so I recently went and dug the recipe out from my archives (and yes, my archive for recipes to try is quite a large one, so stay tuned for future recipe posts).
I adapted the recipe from the original, which I almost always do (call it some kind of cheap pleasure at perpetually wanting to bend the culinary rules; mind you, I never break the law, though!). I mostly used my own measurements for flour and butter as I normally use for my regular cupcakes, simply because I like their light and fluffy texture. However, I found the Red Velvets a little bit on the heavier side, probably because of the buttermilk the recipe called for.
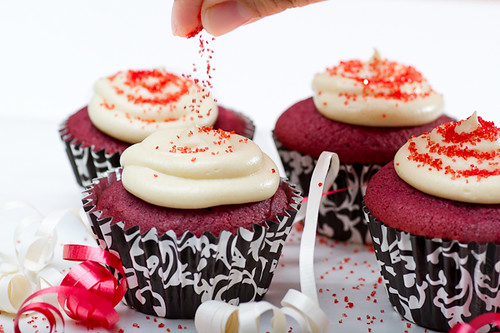
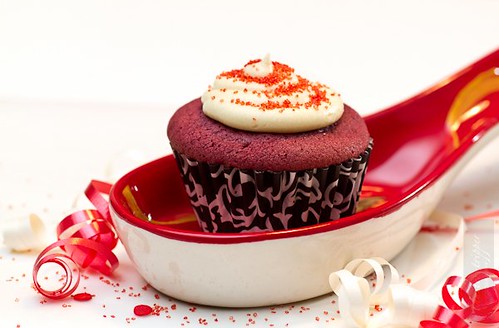
Please read on for my version of the recipe. Not too many images this time, as I baked in the evening, and there wasn't much time to try out different setups. I also wanted to try my hand at using artificial lighting for my food photography, and this was actually one of those exercises. I don't have very high-end lighting equipment, but what I have right now will need to be tweaked a little further, so I can get some nice results. An exercise for another occasion.
The Cupcake
Self-raising flour - 150 gms (5 oz)
Cocoa powder - 2 tbsp
Baking powder - 1/2 tsp
Salt - 1/4 tsp
Unsalted butter, softened at room temperature - 1/4 cup
Granulated sugar - 150 gms (5 oz)
Buttermilk - 1/2 cup
Egg (large) - 1
Pure vanilla extract - 1 tsp
Red food coloring - a few drops
Low Fat Cream Cheese Frosting
Icing or confectioner's sugar - 1 cup
Low-fat cream cheese, softened at room temperature - 125 gms
Unsalted butter, softened at room temperature - 50 gms
Milk - 1 tbsp
Pure vanilla extract - 1 tsp
- Preheat oven to 350 degrees C. Line a muffin pan with cup cake liners and set aside.
- In a small bowl mix together the first 5 ingredients and set aside.
- In a separate bowl, cream together the sugar and butter, until light and fluffy.
- Add the egg and vanilla and mix until well combined.
- Add half of the dry ingredients and half of the buttermilk, making sure it's combined.
- Add the remaining half of the dry ingredients and buttermilk; combine everything together but do not over mix.
- Add enough food coloring to get the desired red color for your cupcakes.
- Using a spatula mix the batter thoroughly making sure nothing is left on the sides of the bowl.
- Using a large ice cream scoop, scoop the batter evenly into your prepared cupcake liners and bake for 18 to 22 minutes or until a toothpick inserted in the center comes out clean.
- Let the cupcakes cool completely before you frost them.
- To make the frosting, simply put all the frosting ingredients into a bowl and mix well with an electric hand mixer.
- Mix until well combined and the frosting has a thick-ish consistency. You can adjust the consistency by adding a tablespoon of milk at a time if it's too thick, or adding a tablespoon of sugar at a time if it's too runny.
- Frost the cupcakes either with a little spatula or use a piping bag fitted with a plain large tip.
- Let cool in the fridge for about 10 to 15 minutes to allow them to set a little before serving (if you can resist them anyway)
OH I LOVE red velvet cupcakes! this will be coming in handy! Please check out my blog and follow, and ill be sure to do the same!!!
ReplyDeletewww.jadinashodgepodge.blogspot.com
Toni,
ReplyDeleteIt's been a while...How are you! Oh those red velvet cupcakes looks delish...:)
Great photos as well, btw!
Noreen