To all ye who want to paint with light ...

I should have started this blog many moons ago as I started experiencing the joys of rediscovering the art of photography. But as the saying goes - it's better late, than never!
So, here I am, in the hopes of recording what I learn as I progress from ignorance to enlightenment; about what my eyes can see that my camera can capture; and, what my mind imagines and my camera paints with its capabilities.

Please feel free to add any comments and share your wisdom (tips or tricks) that you have picked up along the way.

And do check out my How-To and Birding pages as well.


Monday, March 19, 2012

Methi Dal (Yellow Pigeon Peas with Fresh Fenugreek Leaves)

Methi (fenugreek), whether used as a herb or a spice adds a wonderful flavour to Indian cuisine.  However, there are other uses for Methi and you might want to check the Wikipedia for this.

Methi, in its fresh form can be used to make side dishes like Aloo Methi (potatoes with fenugreek), Methi ka Paratha (Indian flat bread with fenugreek), Methi Pulao (rice with fenugreek) - you name it!

IMG_9560.jpg

I had been getting a little bit bored with my dal recipes, so when I happened to come across this one I thought it might be a great idea to give it a try.  This recipe isn't mine.  Purna Chowdhury, a very accomplished culinary enthusiast, was really kind to share this recipe with some of us.  If you want to find more of her fantastic recipes, please go ahead and check her out on Facebook.

IMG_9521.jpg

If you are interested, you might ask her to add you to the foodie group I found this recipe in.  She has a fantastic repertoire of different types of cuisine, and if you're nice and make a request for a specific recipe, she might pull it out of her hat just for you!

Additionally, there are hundreds of other foodies sharing their recipes (me included ;-)), so this should be incentive enough to go join the group.  But do remember - to get some, you need to give some.  Only fair, right?!  So, share your favourite recipes and get some from the others.

IMG_9533.jpg

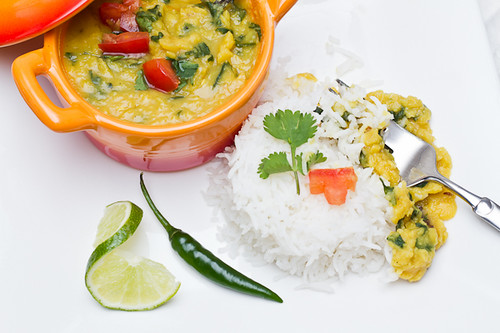
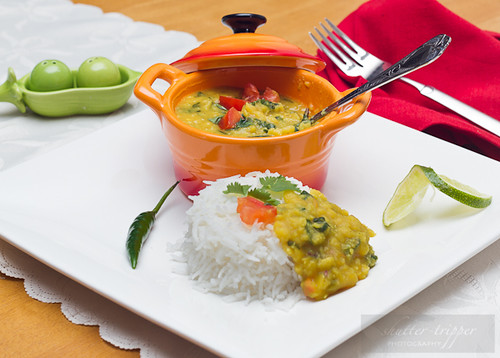
The dal turned out fabulous and I might try this in future with spinach to replace the methi.  And to add a note, I served this daal with a squish of lime over hot and fluffy basmati rice with Aloo Methi on the side (another friend's recipe, but I didn't have the time to take any pictures).

IMG_9549.jpg

To prepare your fresh Methi, my friend Swati told me that you should first pluck the leaves from the stalks, making sure you don't include the stalk, and then wash the leaves thoroughly.  Once you've cleaned the leaves of the sand and grit, soak in cold, saline water for about 20 minutes.  When ready, wring the water out of the leaves and chop them up roughly and you're good to go.  Thanks for the tip, Swati! :)

You will need:
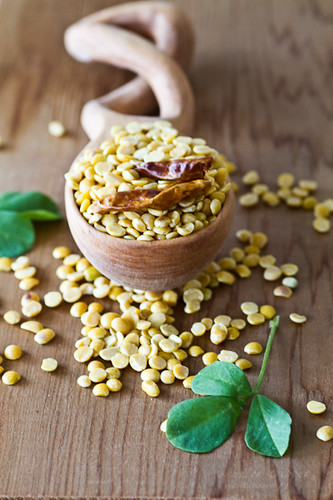
Toor Daal (yellow pigeon peas): 250 gm (cooked with a little salt and turmeric)
Two cups of fresh Methi (fenugreek) leaves/two small blocks of frozen Methi
Whole cinnamon and cloves: 1 tsp
Grated garlic: 1 tsp

Grated ginger: 1tsp
Tomatoes: 2-3
Cinnamon powder: 1/2 tsp
Coriander powder: 1tsp
Fresh coriander, chopped: 1/2 cup

Vegetable oil: 1 tbsp
Ghee: 1 tsp (optional)Salt to taste
Method:

  1. Add the oil to the pan and add all the whole spices. 
  2. Add garlic, ginger; saute for half a minute on low heat.
  3. Add the chopped methi, tomatoes and salt; let it turn to a gravy.
  4. Add the cinnamon and coriander powders and stir till the mix is consistent. 
  5. Add the daal and stir well; cook for another 5 minutes or so till well blended.
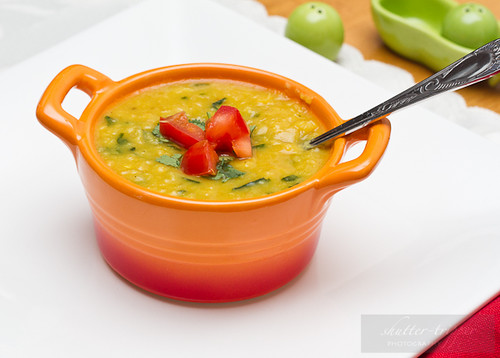
  6. Add a teaspoon of ghee (optional) and serve garnished with coriander.
Happy smacking-your-lips! :)

Friday, March 9, 2012

Peanut Butter & White Chocolate Chip Cookies with Orange Zest

IMG_9489.jpg

IMG_9473.jpg

This was my first attempt at making peanut butter cookies.  I adapted the recipe from here, but as always, tweaked the recipe quite a bit.  I made it into a peanut butter and white chocolate cookie with an orange twist.

IMG_9464.jpg

IMG_9429.jpg

IMG_9459.jpg

The recipe was easy, but I found that I needed to add at least a cup of milk to the dough to get it to the right consistency.  The cookies turned out a little bit dense, but on storing them overnight, a lot of the moistness returned.  Anyone that likes peanut butter cookies would really enjoy these, but I think I might move on to different cookies the next time around.

IMG_9441.jpg

IMG_9405.jpg
You will need:
3/4 cup (170 grams) unsalted butter, room temperature
  • 1/2 cup (105 grams) light brown sugar
  • 1/2 cup (100 grams) granulated white sugar
  • 1 large egg
  • 1 teaspoon pure vanilla extract
  • 3/4 cup (185 grams) peanut butter (smooth or crunchy)
  • 2 cups (260 grams) all purpose flour
  • 1/2 teaspoon baking soda
  • 1/4 teaspoon salt
  • 1/2 cup chopped peanuts or 1/2 cup white chocolate chips (optional)
  • 1 teaspoon orange zest (optional)
  • 1 cup cold milk (if required)


IMG_9424.jpg

IMG_9422.jpg

IMG_9488.jpg


Method
  1. Preheat oven to 350 degrees F  and place rack in the centre of the oven. 
  2. Line two baking sheets with parchment paper.
  3. Beat the butter and sugars until light and fluffy (about 2 - 3 minutes). You could use an electric mixer for this, but I used a hand mixer.
  4. Beat in the peanut butter. Add the egg and vanilla extract and beat to combine. 
  5. In a separate bowl whisk together the flour, baking soda, and salt. 
  6. Add to the peanut butter mixture and beat until incorporated. Fold in the chopped peanuts if using, if using, the white chocolate chips and the orange zest. (If the batter is too dry at this point, add milk a few teaspoons at a time. Alternately, if the batter is too soft, keep in the refrigerator for 30 minutes before forming into balls.)
  7. Roll the batter into 1 inch (2.5 cm) balls. 
  8. Transfer the cookies to the prepared baking sheet, placing about 2 inches (5 cm) apart. Then, using the tines of the fork that has been dipped in white granulated sugar, make a crisscross pattern.
  9. Bake the cookies for about 10 to12 minutes, or until the cookies are lightly browned around the edges. 
  10. Remove from oven and place on a wire rack to cool. Can be stored at room temperature, in an airtight container, for about a week. Freeze for longer storage.

Makes about 40 cookies.

IMG_9453.jpg


DSC_0123.jpg

IMG_9485.jpg

Thursday, March 1, 2012